
Trap Barbell Deadlift: Complete Guide to Technique, Programming, and Equipment
Overview: What the Trap Barbell Deadlift Is and Why It Matters
The trap barbell deadlift (also called hex-bar deadlift) is a variant of the conventional deadlift where the athlete stands inside a hexagonal or diamond-shaped bar and lifts with neutral-grip handles placed at the sides. This setup changes the load vector, reduces shear stress on the lumbar spine, and shifts some demand toward the quadriceps and hip extensors. For strength coaches, rehabilitation specialists, and lifters seeking a safer—and often more powerful—pull, the trap barbell deadlift is an essential tool.
Key performance and safety differences versus the straight bar deadlift include a more upright torso position, a shorter moment arm relative to the knees, and frequently higher peak power output. Multiple research summaries and laboratory studies indicate that peak power and vertical force are often higher in trap bar deadlifts, and many athletes record a higher one-rep max (1RM) with a hex bar—commonly reported in the range of 5–15% greater than conventional 1RM for similar lifters. Practically, this makes the trap barbell deadlift useful for power development, initial pull training, and return-to-sport protocols where lower lumbar shear is a priority.
Real-world applications span:
- Strength & conditioning: use for heavy triples, doubles, or singles to develop intent and posterior-chain strength without excessive spinal load.
- Rehab & prehab: early-stage return to lifting after low-back issues where neutral grip and reduced shear are beneficial.
- General fitness: safer option for new lifters who struggle with barbell setup and technique.
Practical statistics and context:
- Typical programming intensity: 70–95% of trap bar 1RM for strength phases; 40–70% for power and speed work.
- Common set/rep structures: 3–6 sets of 1–6 reps for maximal strength; 6–8 sets of 2–4 reps at 40–60% for speed-strength.
- Time-under-tension guidance: keep concentric intent fast for power work; controlled eccentric (2–3 seconds) when targeting hypertrophy.
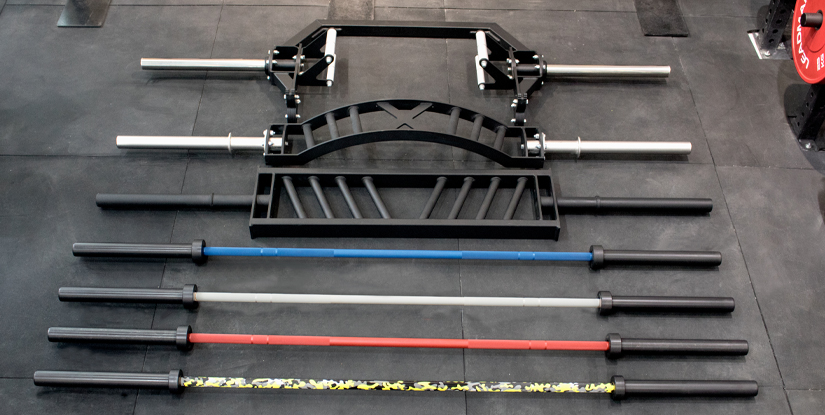
Visual elements description: imagine a top-down diagram showing the lifer’s feet hip-width, bar centered between the feet, handles aligned mid-foot, and torso angle approximately 30–45 degrees—less hip hinge than a conventional deadlift. Below the diagram, include a side-by-side silhouette comparison: conventional deadlift (more horizontal torso) vs trap barbell deadlift (more upright). These visuals help coaches communicate posture and bar path.
Technique: Step-by-Step Guide to a Safe and Effective Trap Barbell Deadlift
Follow this actionable, step-by-step setup and execution guide to master the trap barbell deadlift. Each step includes common coaching cues and checks to ensure consistency and injury prevention.
- Position the bar: Place the trap bar so the handles are even with mid-foot. Stand inside with feet roughly hip- to shoulder-width depending on limb length.
- Grip & stance: Reach down and grasp the neutral handles. Use a double overhand or mixed grip if needed. Toes should point roughly 5–15 degrees outward; knees track in line with toes.
- Set the spine: Create a neutral lumbar spine—tuck chin slightly and keep chest proud. Avoid hyperextension. Cue: “brace like you’re about to be punched in the stomach.”
- Hip and knee setup: Push hips back slightly, then bend knees until shins contact the handles. Hips should be lower than a conventional deadlift for many lifters, resulting in more quadriceps involvement.
- Initial drive: Take a big breath, brace, and drive through the heels. Keep the bar path vertical and close to the body. Cue: “push the floor away.”
- Lockout: Finish by extending the hips until neutral; do not hyperextend the lower back. Squeeze glutes at the top for 1–2 seconds.
- Descent: Hinge at the hips first and then bend the knees once the bar passes them. Maintain spinal neutrality; control the eccentric phase as required by the program.
Coaching tips and common corrections:
- If the hips shoot up too fast, cue “knees out” and reduce load—this indicates the hamstrings are not controlling the initial pull.
- If the bar drifts forward, widen stance slightly or shorten the lift setup by moving feet back a few centimeters.
- Use microloads (1–2% jumps) near 1RM to maintain technique under maximal efforts.
Warm-up & progressive ramping (example):
- Bodyweight hinge drills × 10
- Empty trap bar × 10
- 40% of working 1RM × 5
- 60% × 3
- 80% × 2
- Work sets
Programming, Progressions, and a Case Study
Programming the trap barbell deadlift depends on goals: maximal strength, power, hypertrophy, or rehabilitation. Use the following frameworks and an applied case study to guide implementation.
General progressions:
- Strength focus: 3–6 sets of 2–6 reps at 80–95% of trap bar 1RM, 2–4 minutes rest.
- Power/speed: 6–8 sets of 1–3 reps at 40–60% with maximal intent, 45–90 seconds rest.
- Hypertrophy: 3–5 sets of 6–12 reps at 60–75% with 1–3 second eccentric and controlled tempo.
- Rehab/technique: 3–4 sets of 5–8 reps at 30–50% focusing on perfect mechanics and bracing patterns.
Progression plan (12-week example for a recreational lifter):
- Weeks 1–4 (Foundations): 2 sessions/week, 3 sets × 5 reps @ 65–75% focusing on technique and tempo.
- Weeks 5–8 (Strength Build): 2 sessions/week, 4 sets × 3 reps @ 75–85% with 2–3 minutes rest.
- Weeks 9–12 (Peaking): 1 heavy session with singles/doubles at 85–95% and one speed day at 50–60% for intent.
Case study (applied example): A 28-year-old soccer player with prior low-back discomfort shifted to trap bar loading to rebuild pull strength. Over 10 weeks, the athlete progressed from 3 sets × 6 reps at 45% to 4 sets × 3 reps at 82% of trap bar 1RM, reporting a 12% improvement in trap bar 1RM and reduced discomfort during sprinting. The program prioritized bracing, glute activation, and single-leg accessory work to transfer force to sprint mechanics. Coaches recorded velocity data: the athlete increased mean concentric bar velocity at 60% by ~8%, indicating improved power output.
Equipment Selection, Safety, and Maintenance
Choosing the right trap bar and maintaining it reduces injury risk and improves longevity of training. Pay attention to handle height, knurling, construction, and load capacity.
Buyers’ checklist:
- Handle height: Low handles (closer to the floor) are preferable for powerlifters seeking full ROM; raised handles assist in early-rehab or mobility-limited athletes.
- Handle type: Dual-height handles allow versatility—use lower handles for full-range strength, higher handles for technique work or individuals with limited hip mobility.
- Knurling & finish: Moderate knurling provides grip without tearing hands. Corrosion-resistant powder coating extends life.
- Load capacity: Standard commercial hex bars range 700–1,000+ lbs; select according to user needs.
Safety and maintenance best practices:
- Inspect welds and sleeves monthly; replace if bending or cracks are present.
- Keep sleeves clean and lubricated with light machine oil to prevent binding when loading plates.
- Use bumper plates for explosive speed sessions; metal plates are acceptable for maximal strength but protect flooring and sleeves.
- Encourage chalk or lifting straps when necessary to maintain grip without sacrificing technique.
Accessory recommendations to improve trap bar deadlift carryover:
- Romanian deadlifts or hamstring curls for posterior chain robustness
- Front squats and split squats to strengthen knee drive and single-leg stability
- Core anti-extension work (planks, Pallof presses) to improve bracing
FAQs (Professional)
- Q1: Is the trap barbell deadlift better than the conventional deadlift? It depends on objectives. The trap bar reduces lumbar shear and often allows higher peak power and heavier 1RM. For posterior chain specificity and competitive powerlifting technique, conventional deadlifts remain indispensable. For general strength, power, and rehab, the trap bar is often preferable.
- Q2: How should I choose handle height? Use low handles for full range and strength. Use raised handles if you have limited hip mobility, are early in rehab, or want to emphasize lockout mechanics.
- Q3: How often can I train trap bar deadlifts? For strength phases, 1–3 sessions per week depending on intensity. Heavy singles require longer recovery; speed days can be more frequent (2–3x/week) at low loads with adequate rest.
- Q4: What are common faults? Hips rising too fast, rounded lumbar spine, bar drifting forward. Correct with tempo work, reduced load, and targeted accessory lifts.
- Q5: Can I use straps? Yes—straps are appropriate for maximal sets to avoid grip limiting performance, provided they don’t mask technical weakness.
- Q6: Should novices start with trap bar deadlifts? Many novices benefit from starting with the trap bar due to simplified setup and safer spinal mechanics. Transition to conventional variations as technique and mobility improve.
- Q7: How to integrate trap bar into a sport program? Use trap bar for power and heavy transfer days; pair with sprint or jump work to maximize transfer to athletic tasks.
- Q8: Are there gender differences in programming? Programming principles are similar. Monitor recovery and adjust volume based on individual response rather than gender alone.
- Q9: What grip should I use? Double overhand is preferred for training; mixed grip or hook grip can be used for heavy maximal attempts depending on wrist comfort.
- Q10: How to measure improvement? Track trap bar 1RM, bar velocity at fixed loads, and sport-specific performance metrics like sprint times or jump height for transfer assessment.
- Q11: Any contraindications? Acute sacroiliac or unstable spinal conditions should be evaluated by a clinician before loading. If in doubt, use minimal loads focused on bracing and technique.