
Trap Barbell Training: Comprehensive Guide to Technique, Programming, Buying, and Maintenance
Why the Trap Barbell Matters: Science, Benefits, and Real-World Use
The trap barbell (also known as the trap bar or hex bar) has become a staple in strength training, physical therapy, and athletic performance programs. Compared with conventional straight-bar deadlifts, biomechanics research and applied coaching consistently highlight several advantages: reduced lumbar shear and compressive loads, a more upright torso position, and an ability to produce higher peak power and heavier comfortable loads for many lifters. For example, multiple lab studies report increases in vertical force and power output in trap bar deadlifts by approximately 5–15% compared with conventional deadlifts, making it particularly useful for power development and rehabilitation contexts.
Benefits are practical and measurable across populations:
- Lower back stress reduction — the neutral handle position aligns force vectors, often reducing perceived low-back strain in athletes and clinical patients.
- Greater knee involvement — trap bar movement shifts some demand toward knee extension, increasing quadriceps engagement; EMG studies typically show elevated quad activation versus straight-bar deadlifts.
- Higher training loads and power carryover — lifters often lift heavier absolute loads and produce greater vertical velocity, which has direct transfer to sprint, jump, and power tasks.
- Accessibility — many beginners, older adults, and clients returning from injury report better form and confidence using the trap bar, accelerating technique acquisition.
Real-world applications are broad: collegiate strength programs use trap barbell sets for S&C warm-ups and maximal strength days; rehabilitation clinics prescribe controlled trap bar deadlifts to restore hip hinge mechanics while limiting spinal load; and commercial gyms include trap bars to provide a safer alternative for recreational lifters. Case study: a university football team integrated trap bar jumps and heavy trap bar sets twice weekly for 8 weeks and observed a 6% mean increase in vertical jump and a 4% reduction in reported low-back soreness compared with previous cycles relying predominantly on conventional deadlifts.
Key metrics to track when using the trap barbell include: concentric bar velocity (m/s) during power sets, peak force or load relative to bodyweight (e.g., 1.5–2.5x bodyweight is common among trained males), and session rate of perceived exertion (RPE). Tracking these metrics provides objective feedback to guide progression, manage fatigue, and quantify transfer to sport-specific outcomes.
Technique, Safety, and Programming Fundamentals for the Trap Barbell
Mastering trap bar technique requires attention to setup, cueing, and individualized load prescription. Start with posture: feet roughly hip-width, toes pointing slightly out if needed for comfort, and the bar positioned around midfoot. Engage the lats, set the spine neutral, and ensure shoulders sit over the bar handles. Because handle height differs between trap bars, confirm that when you grip the handles your hips can move freely through a full hinge without early lumbar flexion. A practical safety check: record a set from the sagittal plane and ensure the sternum tracks over or slightly ahead of the bar throughout the pull.
Risk mitigation tips:
- Perform a warm-up sequence: 5–10 minutes light aerobic, dynamic hip hinge drills, and 2–3 ramp sets to ~50–70% working load.
- Use a controlled eccentric tempo for beginners (e.g., 2–3 seconds down) to ingrain hinge patterns.
- When targeting maximal strength, implement spot protocols like accommodating rest-pause or a 3–5 minute rest between heavy singles to maintain technique integrity.
Step-by-step Setup and Deadlift Execution
Follow this stepwise guide to perform a safe, effective trap bar deadlift:
- Position the bar over midfoot: Stand so the center of the trap bar sits above your midfoot; your shins should be close without touching the frame excessively.
- Foot stance: Aim for hip- to shoulder-width depending on anthropometrics; experiment with slight toe-out for hip comfort.
- Grip and chest: Reach down, grip both handles, pull your shoulder blades down and back, and lift your chest. The neutral handle reduces shoulder internal rotation compared with straight-bar rows.
- Set the hinge: Break at the hips while keeping a neutral spine; knees will bend naturally to allow the bar to pass your knees without scraping them too much.
- Drive through heels: Initiate the concentric by driving the feet into the ground, extending hips and knees simultaneously until full extension. Finish by squeezing the glutes, not by hyperextending the lumbar spine.
- Lower under control: Hinge at the hips first, then allow the knees to bend to guide the bar back to the floor on a controlled eccentric path.
Common coaching cues: “push the ground away,” “chest up, hips back,” and “finish by squeezing the glutes.” For athletes, adding a short isometric pause (1–2 seconds) at mid-thigh on heavy sets can improve lockout strength and reinforce torso stability.
Programming, Progressions, and Sample Workouts
Programming trap barbell work depends on goals—power, strength, hypertrophy, or rehab. Below are practical templates and progression strategies grounded in percentage-based and autoregulatory approaches.
Strength-focused progression (8–12 weeks):
- Weeks 1–4: 4 sets x 6 reps @ 70% 1RM, 2–3 min rest — focus on technique and tempo (2s eccentric).
- Weeks 5–8: 5 sets x 5 reps @ 75–80% 1RM, 3–4 min rest — emphasize bar speed; test a heavy double at end of week 8.
- Deload week 9: 3 sets x 5 reps @ 60% to recover.
Power/hybrid session (twice weekly):
- Session A (heavy): 5 sets x 3 reps @ 85–90% 1RM — long rests, focus on maximal force.
- Session B (speed): 8 sets x 2 reps @ 40–60% 1RM — focus on bar velocity; use velocity-based training (VBT) thresholds (e.g., maintain >0.6 m/s).
Rehabilitation or beginners: start with trap bar Romanian deadlifts (RDL) and partial range-of-motion sets (3 x 8–12 @ 40–60% 1RM), emphasize tempo and pain-free movement, and progress by increasing ROM and load by 5–10% every 2 weeks based on movement quality.
Case study: A group of collegiate athletes used a block periodization model integrating trap bar power (light day), trap bar strength (heavy day), and accessory unilateral posterior chain work. Over a 10-week mesocycle, sprint times improved by a mean of 0.04s (suprathreshold for field hockey players) while reported hamstring strain incidence decreased compared with the prior season.
Buying, Maintenance, Accessories, and Best Practices
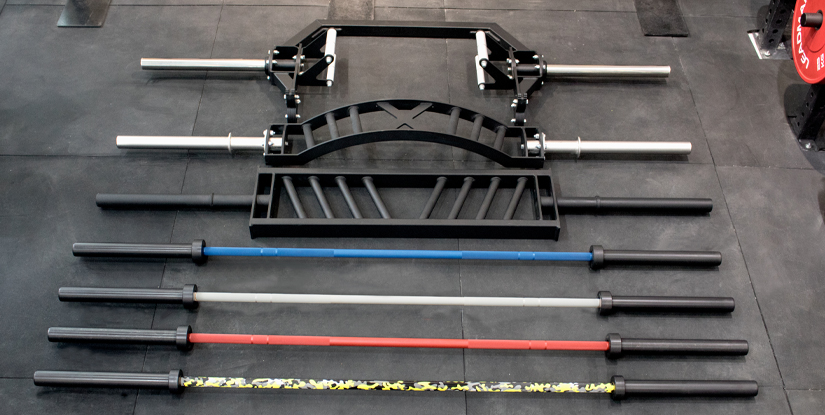
Choosing the right trap barbell requires evaluating handle height, handle type (neutral vs. raised), diameter, material, and footprint to match training goals and facility constraints. Handle height (standard vs. elevated) affects starting position: low handles replicate a standard deadlift range, while raised handles reduce the range of motion, often enabling heavier loads and safer lifts for those with limited mobility. Handle knurling influences grip security; moderate knurling is preferred for general populations to balance comfort and grip hold.
Buying checklist:
- Measure doorways and storage space — trap bars are typically 50–55 inches long; confirm clearance.
- Choose finish: black oxide or zinc resists corrosion in high-humidity gyms; bare steel may rust faster.
- Check sleeve diameter — standard olympic plate sleeves (50mm) ensure compatibility with existing plates.
- Consider specialty models: adjustable trap bars, deadlift jack integrated, or folding variants for space-limited facilities.
Choosing the Right Trap Barbell for Your Gym or Home
Match bar selection to user population. For performance facilities with trained athletes, a competition-grade hex bar with dual handle heights and aggressive knurling maximizes versatility. For rehabilitation clinics and multipurpose gyms, choose a trap bar with neutral, smooth handles and a slightly raised handle option to accommodate reduced ROM and enhance safety. Budget considerations: basic trap bars range from $150–$300, mid-tier commercial models from $300–$700, and high-end specialty models above $700. Anchor choices to user volume and intended lifespan; heavy-use commercial settings require thicker gauge steel and reinforced welds.
Visual element description for buyers: imagine a top-down blueprint — the hexagonal frame should allow the lifter to stand fully inside with at least 2–3 inches clearance from the sides. Elevated-handle models create a 2–3 inch height increase compared to standard handles, reducing hip flexion at setup. Verify load rating; many commercial hex bars are rated for 1,000–2,000+ lbs for safety in high-load environments.
Maintenance, Storage, and Safety Checks
Routine maintenance extends service life and prevents accidents. Recommended schedule:
- Daily or weekly: Wipe down bar with a dry cloth after use; inspect handles and welds visually for cracks or bending.
- Monthly: Apply a light coat of protective spray to zinc-plated surfaces; inspect sleeve bearings if present and clean debris from knurling with a wire brush.
- Quarterly: Verify load-bearing welds and plate sleeves for wear; rotate bar orientation in storage to prevent uneven wear patterns.
Storage best practices: store vertically in a rack designed for trap bars or horizontally on a padded shelf to avoid frame deformation. For gyms, implement an equipment log documenting inspections, cleaning dates, and any reported issues. Safety audits should include a quick pull test at light loads (e.g., 20–30% 1RM) to confirm straight travel and no wobble in handles.
Accessories to consider: rubber bumper plates to protect frames, lifting straps for very heavy maximal attempts when grip is the limiting factor, and platform mats to reduce noise and protect gym floors.
Frequently Asked Questions (FAQs)
- Q: Who benefits most from using a trap barbell? A: The trap bar benefits a wide range of users including athletes prioritizing power and speed, beginners learning hinge mechanics, older adults seeking reduced lumbar stress, and rehabilitation patients needing controlled loading strategies. It is particularly useful when vertical force and heavier comfortable loads are desired.
- Q: Is a trap bar better than a conventional barbell? A: “Better” depends on goals. For spinal load reduction, power development, and easier technical learning curve, the trap bar is superior. For developing conventional deadlift-specific strength and posterior chain carryover to certain strength sports, the straight bar remains important. Many effective programs include both.
- Q: How should I adjust programming for athletes versus general fitness clients? A: Athletes often use block periods with separate power (light, fast sets) and strength (heavy, low-rep sets) days, plus sport-specific accessory work. General fitness clients should prioritize technique, higher-rep hypertrophy blocks (e.g., 3 x 8–12), and conservative progression (5–10% load increases every 2–3 weeks) with more recovery emphasis.
- Q: Can the trap bar help with back pain? A: Yes, when used correctly under professional guidance, trap bar deadlifts can reduce lumbar shear forces and allow hypertrophy and strength gains while minimizing pain. Start with light loads, monitor symptoms, and prioritize gradual progression and core stability work.
- Q: What are common technique errors to avoid? A: Common errors include premature lumbar flexion, excessive knee collapse, bouncing the bar off the floor, and using the trap bar to mask weak hip hinge patterns. Address these with tempo work, video feedback, and accessory hamstring and glute exercises.
- Q: How often should athletes train trap bar lifts per week? A: Depending on load and goals, 1–3 sessions per week is common. Example: heavy strength day plus an optional speed-focused day. Ensure adequate recovery; avoid heavy consecutive days that compromise form.
- Q: How do I calculate 1RM for trap bar deadlifts safely? A: Use a submaximal testing protocol—perform a conservative 3–5 rep set at a challenging but safe weight and use validated 1RM calculators (e.g., Epley or Brzycki formulas) to estimate 1RM. For true maximal testing, use progressive ramping with long rests and experienced spot supervision.