
Wall Mount Weight Lifting Rack: Ultimate Guide to Choosing, Installing, and Training Safely
Why Choose a Wall Mount Weight Lifting Rack?
Wall mount weight lifting racks are engineered to deliver heavy-duty strength training in compact spaces. Unlike freestanding power racks, a wall-mounted rack transfers load directly into structural framing, creating a slim footprint ideal for home gyms, garage gyms, boutique studios, and commercial facilities seeking to maximize floor space. For many users the primary advantages are space efficiency, stability, and versatility.
Space efficiency: A typical wall mount rack projects 18–30 inches from the wall, saving 6–12 square feet compared to a 4ft x 6ft freestanding rack. This is critical in apartments and small garages where every square foot matters. In practical terms, a wall mount solution often increases usable floor area by 15–30% compared to a traditional rack layout.
Stability and load capacity: Properly mounted, these racks can match or exceed many freestanding options. Common consumer models are rated between 500 lb and 1,200 lb; commercial-grade units often provide 1,500 lb or more. Construction typically uses 10–11 gauge steel (about 3 mm thickness) and powder-coating for corrosion resistance. The wall anchoring method—mounting into studs or masonry anchors—dictates ultimate safety and usable working load.
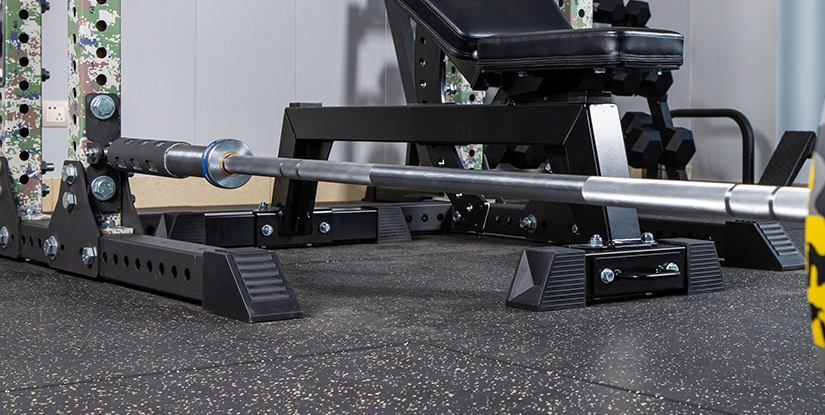
Versatility: Modern wall mount racks integrate J-cups, safety arms, pull-up rig attachments, band pegs, and plate storage. This makes them suitable for barbell training (squats, presses), bodyweight movements (pull-ups), and accessory work (rows, landmine). Many models also fold or tuck against the wall for unobtrusive storage.
Cost and ROI: Entry-level wall mount racks can cost $250–$600, mid-range $600–$1,200, and commercial units $1,200–$3,000+. When evaluating cost per square foot and long-term durability, a wall-mount rack often presents a lower total cost of ownership for space-constrained buyers. Case study: a boutique studio replaced two bulky rigs with four wall-mount units, increasing training stations by 33% while freeing space for conditioning equipment—improving revenue per square foot.
Applications and real-world examples: Home users gain a full Olympic-style setup without sacrificing a garage parking spot; PTs and small gyms use wall-mounted racks to create modular training bays; rehab clinics utilize wall mount racks for safe overhead work and assisted progressions. When properly selected and installed, a wall mount weight lifting rack can match the performance of freestanding equipment while offering unique spatial advantages.
Selecting and Installing Your Wall Mount Weight Lifting Rack
Choosing the right wall mount weight lifting rack requires assessing capacity, materials, mounting substrate, and accessory ecosystem. Begin by defining primary uses (heavy barbell squats vs. light conditioning), available wall types (wood studs, concrete block, poured concrete), and desired attachments (pull-up bar, dip handles, band pegs, safety arms). Matching these needs to product specs reduces retrofit headaches.
Key selection criteria:
- Working load limit (WLL) and dynamic load capability—look for stated maximum and a safety margin of at least 25% beyond planned use.
- Steel gauge and weld quality—11-gauge (3/16") is typical for commercial-grade 1,000+ lb systems; thinner gauge units may be appropriate for lighter home use.
- Mounting footprint and stud pattern—confirm hole spacing aligns with 16" or 24" stud spacing or plan for a mounting ledger/backplate.
- Finish and corrosion protection—powder coat or zinc plating prolongs life in humid environments.
- Accessory compatibility—ensure J-cups, safeties, and pull-up attachments are robust and easily replaceable.
Environmental and structural checks are critical: use a stud finder, confirm stud depth (2x6 or ledger), or if mounting to masonry, select appropriate wedge or sleeve anchors. When in doubt, consult a structural engineer—especially for heavy commercial installations or when mounting to older framing.
Assessing Load Ratings and Materials
Evaluating load ratings means understanding both static and dynamic forces. Static load refers to weight at rest (a loaded barbell racked), while dynamic load includes drops, eccentric forces, and momentum. Manufacturers often list static capacity—verify whether dynamic loads are covered. For Olympic lifts and dropped weights, many experts recommend a freestanding rig or specifically rated wall mount with reinforced backplate and shock-absorbing elements.
Material choices influence durability and cost. Typical options:
- 11-gauge steel (commercial)—high capacity, best for gyms.
- 12–14 gauge steel (consumer)—suitable for most home users.
- Stainless or galvanized components—recommended for humid/garage environments to prevent rust.
Anchor hardware matters: 3/8" or 1/2" lag bolts into solid 2x8 studs are common for wood-framed walls; for concrete, use 3/8"–1/2" wedge anchors or sleeve anchors rated for shear and tensile strength. Always use multiple anchor points across at least two studs or a continuous backplate to distribute load.
Step-by-Step Installation Guide
Follow this practical installation sequence. Estimated time: 2–4 hours for two people. Tools needed: stud finder, level, drill/driver, sockets, torque wrench (if available), masonry bits (if needed), measuring tape, and pencil.
- Site survey: Verify wall construction (wood studs, concrete block, poured concrete) and locate utilities. Mark desired rack height and check clearance for pull-ups and barbell movements—allow 36"+ in front for bar path.
- Measure and mark stud centers at planned mounting points. Confirm vertical alignment using a plumb line and horizontal level across bolt hole rows.
- Pre-drill pilot holes in studs or masonry. For wood, use pilot holes slightly smaller than lag diameter (e.g., 3/8" lag requires ~7/16" pilot depending on species); for concrete, drill to anchor manufacturer specs.
- Lift rack onto wall (two-person lift). Align holes and insert lag/wedge anchors. Tighten progressively, ensuring the backplate is flush; do not over-tighten—snug to manufacturer torque, then re-check after 24 hours under load.
- Attach accessories (J-cups, safeties, pull-up bars) and verify fit. Test with incremental loads: start with unloaded bar, then add plates in 50–100 lb increments up to intended working weight while monitoring movement.
- Final inspection: ensure no shifting, test pull-ups and pressing motions, and inspect anchor points for any gaps or splitting in the lumber.
Tip: If wall studs do not align with desired rack width, consider a laminated plywood ledger bolted across multiple studs to distribute load evenly.
Training, Programming, Safety, and Maintenance for Wall Mount Racks
A wall mount weight lifting rack supports many training modalities if used correctly. Programming should reflect rack-specific capabilities—prioritize compound lifts that use J-cups and safeties, bodyweight work on pull-up attachments, and accessory movements using bands or plates. Below are recommended progressions and safety best practices tailored for wall-mounted racks.
Design programs around rack strengths: barbell back/front squats, bench press (with an adjustable bench), overhead press, rack pulls, and paused variations. Use the rack safeties to practice heavy singles or working sets without a spotter. For hypertrophy, use drop sets and tempo work; for strength, employ low-rep heavy sets with adequate recovery.
Safety best practices:
- Always inspect that J-cups and safeties are seated securely before loading the bar.
- Keep weight centered and balanced; uneven loading increases lateral shear on anchors.
- Use bumper plates if dropping from height; otherwise avoid deliberate drops on wall-mounted racks unless rated for drop loads.
- Periodically re-check tightness of fasteners after initial install and every month thereafter.
Exercise Progressions and Programming
Beginner progression (first 8–12 weeks): focus on technique and building load tolerance. Example weekly split:
- Day 1: Squat 3x5, Pull-ups 3x5, Romanian deadlift 3x8
- Day 2: Bench press 3x5, Overhead press 3x5, Face pulls 3x12
- Day 3: Front squat 3x5, Rack pulls 3x5, Core work
Programming tips: For strength phases use 3–6 sets of 2–6 reps at 80–95% 1RM. For hypertrophy, use 3–5 sets of 8–15 reps at 60–80% 1RM. Track weekly load volume and reset if technique deteriorates.
Inspection, Maintenance, Troubleshooting, and FAQs
Maintenance schedule:
- Daily/weekly: quick visual check for loose bolts, paint chips, and obvious deformation.
- Monthly: torque-check major anchors and fasteners, inspect welds, and test safeties under moderate load.
- Annually: full inspection for metal fatigue, rust treatment, and re-coating if necessary.
- Wobble at pull-up bar—tighten anchors and check stud integrity; add shim or backplate if needed.
- Creasing or noise under load—inspect weld seams and replace compromised components immediately.
- Insufficient capacity—avoid overloading; upgrade to commercial-grade rack or add a continuous ledger to spread load.
10 Professional FAQs (专业 style):
- Q1: What minimum stud size is required for a secure mount?
A: Use at least 2x6 studs or a continuous ledger/backplate across multiple 2x4 studs; deeper studs increase latent holding strength. - Q2: Can I drop weights on a wall mount rack?
A: Only if the unit is explicitly rated for drop loads. Otherwise use bumper plates and avoid drops to protect anchors and wall structure. - Q3: How do I calculate safe working load for my installation?
A: Sum static and anticipated dynamic loads, apply a safety factor of 1.25–1.5, and ensure anchor ratings exceed the resulting value. - Q4: Is concrete or wood better for mounting?
A: Both can be suitable. Concrete provides excellent shear/tensile strength with proper anchors; wood framed walls require correct stud engagement and longer lag bolts. - Q5: How often should anchors be rechecked?
A: Inspect after the first 24 hours under load, then monthly or after heavy sessions. - Q6: What steel gauge is recommended for commercial use?
A: 11-gauge or heavier with reinforced welds is standard for commercial racks supporting 1,000+ lb. - Q7: Can I add a pull-up bar to an existing rack later?
A: Many manufacturers offer add-on pull-up attachments; verify mounting holes and capacity before retrofitting. - Q8: How do I prevent rust in humid climates?
A: Choose powder-coating, galvanization, or stainless components; apply light oil to high-contact areas and ensure good ventilation. - Q9: What accessories improve safety most effectively?
A: High-quality J-cups with UHMW liners, robust safety arms, and band pegs for spot assistance are excellent investments. - Q10: When should I consult a structural engineer?
A: For heavy commercial use, mounting to compromised walls, historic structures, or when planned loads exceed 1,500 lb total, seek professional assessment.
Following these guidelines ensures your wall mount weight lifting rack is a safe, efficient, and long-lasting part of your training environment.