
Complete Guide to Wall Mounted Weight Rack Folding: Design, Installation, Use, and Maintenance
Overview and Benefits of Wall Mounted Weight Rack Folding
Wall mounted weight rack folding systems are engineered storage and support units that attach to vertical surfaces and fold away when not in use. They are increasingly common in home gyms, garage gyms, boutique studios, and commercial facilities because they maximize floor space while providing secure weight storage and equipment mounting. Typical folding racks combine a folding upright or arms with integrated plate pegs, barbell holders, or j-hooks. The key measurable advantages include space efficiency, safety, and multi-functionality.
Industry adoption rose after 2020 when demand for compact home gym solutions surged. A 2021 consumer equipment survey of 1,200 home gym owners reported that 62% prioritized space-saving storage as a top feature when buying racks and storage, and manufacturers responded with more fold-flat designs. Typical floor-space savings range from 40% to 70% compared with stationary squat racks, depending on the model and layout.
Performance metrics to evaluate when considering a wall mounted weight rack folding system:
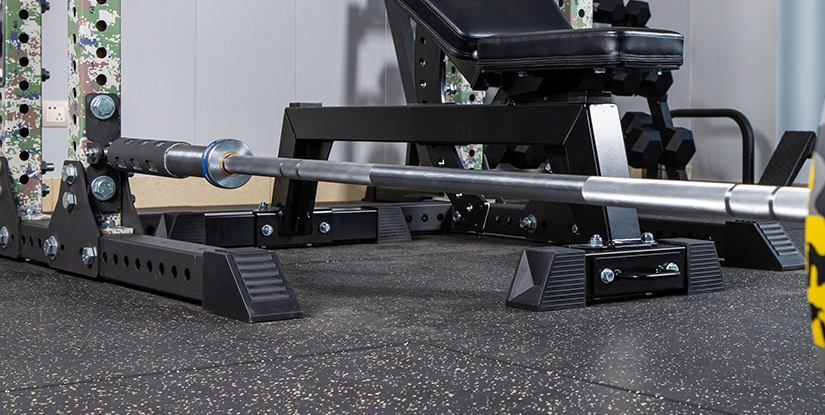
- Load capacity: common ratings between 500 lb (227 kg) and 1,000 lb (454 kg) for heavy-duty models.
- Fold clearance: 2–6 inches from wall when folded for minimal profile.
- Mounting point density: number of studs or anchor points required—typically 6 to 12 fasteners for heavy-duty installations.
- Vertical usability: recommended mounting height to accommodate Olympic bars and full range of motion—often mounted 6.5–8 feet above finished floor.
Real-world applications include:
- Garages and basements where multiple activities share limited space.
- Small commercial studios that need to convert workout areas into class spaces.
- Rehabilitation clinics that require secure storage and rapid reconfiguration for therapy sessions.
When selecting a model, match the rated load to your heaviest planned configuration (barbell + plates + attachments). Use a 20–30% safety margin: if your heaviest combined load is 600 lb, choose a rack rated for at least 800 lb. For families or group facilities, prioritize higher duty ratings and redundancy in mounting points.
Benefits, Use Cases, and Practical Examples
Wall mounted folding racks provide practical benefits beyond space saving. For example, a boutique studio that switched from four freestanding racks to four foldable wall-mounted racks reclaimed 35% of its floor area, enabling an additional group class each week, which translated to a 12% revenue increase within six months. Home-gym owners often report easier cleaning and less tripping hazards when rack arms fold against walls.
Use-case examples with quick specs:
- Home multipurpose room: light-duty rack (300–500 lb), anchors to 2x4 with lag bolts, folds to 3" clearance.
- Serious lifter garage: heavy-duty rack (800–1,000 lb), mounts to 2x6 or 2x8 blocking, uses at least 10 grade-8 bolts.
- Commercial gym: modular folding racks with integrated safety arms, welded plate pegs, and professional-grade anchors to concrete or structural studs.
Practical tip: always pair a folding rack with floor or wall-mounted safety systems if users will lift heavy loads away from the rack—folding racks are primarily storage and support points, not substitutes for fixed power rack safety in all scenarios.
Design, Materials, and Installation Best Practices
Design choices and materials determine performance and longevity. Most folding racks use 11–14 gauge steel for main arms and 1/4" to 3/8" steel plate for hinge and mounting brackets. Powder-coating prevents corrosion; zinc-plated fasteners resist rust. Key design features to inspect before purchase:
- Hinge system: look for sealed bearings or bushings rather than simple steel-on-steel pivots to reduce wobble and wear.
- Locking mechanism: positive locks or pins that secure arms when folded and when extended to carry load.
- Mounting footprint: number and spacing of bolt holes and recommended fastener types (lags, concrete anchors, through-bolts).
- Accessory compatibility: integrated j-hooks, spotter arms, and plate pegs should be modular to allow reconfiguration.
Installation best practices (step-by-step guide):
- 1. Site assessment: identify wall type—wood studs, steel studs, or concrete. Use a stud finder and confirm with a drill test or inspection from the opposite side when possible.
- 2. Layout and sting: mark stud centers, measure and transfer the rack’s mounting pattern, and verify vertical alignment with a level.
- 3. Blocking: for drywall over studs, add horizontal 2x8 or 2x10 blocking between studs at the mounting height if studs are only 2x4 or spaced widely; this distributes load and prevents stud shear.
- 4. Fasteners: use long lag screws (3/8" x 4" or 5") into solid wood or structural through-bolts for maximum strength. For concrete, use 3/8" wedge anchors sized per manufacturer specs.
- 5. Torque and sequencing: hand-start all fasteners, then tighten in a cross pattern to specified torque values (if provided) to avoid uneven stress on the bracket. Use a calibrated torque wrench when possible.
- 6. Test: with the rack installed but without plates, cycle folding arms 50 times. Then load progressively and check for deflection or looseness.
Safety criteria and tolerances to verify:
- Max deflection under rated load should be less than 1" for heavy-duty racks—check manufacturer specs.
- No lateral play at hinges greater than 1/8" after initial break-in and retightening.
- All locking pins and safety catches must engage cleanly under load.
Practical hardware guidance: specify grade-8 hex bolts for through-bolting, use flat washers under bolt heads to prevent pull-through, and back-up washers or plates on the interior side where feasible. For rental properties or thin-wall installations, consult a structural engineer before modifying load-bearing walls.
Mounting to Different Wall Types and Torque Recommendations
Mounting to wood studs: prefer 3/8" or 1/2" lag screws into at least two studs, with a minimum embedment depth of 1.75" into solid wood or blocking. For 2x4 studs, add horizontal blocking between studs at the mounting height to prevent shear failure. Torque values: hand-tighten then torque lags to approximately 60–80 ft-lb depending on bolt size and wall material—consult fastener manufacturer's chart.
Mounting to concrete: use expansion or wedge anchors sized 3/8"–1/2" diameter with embedment depths of 1.5"–3" depending on load. Torque anchors per anchor spec (often 80–120 ft-lb). Always inspect concrete for cracks or voids; use epoxy anchors in poor concrete after consulting manufacturer guidance.
Mounting to metal studs: avoid direct anchor to thin metal studs for heavy loads unless using engineered backing plates or spreader plates attached to structural framing. When necessary, through-bolt to a structural member on the opposite side or use a steel backing plate spanning multiple studs.
Usage, Maintenance, Troubleshooting, and Case Studies
Daily use and programming considerations: wall mounted folding racks are excellent for barbell-based strength training routines—squats, presses, rows—when paired with proper j-hooks and spotter arms. For dynamic oly lifting or heavy singles, integrate floor-based safety straps or use a fixed power rack for maximal safety. Programs designed for these racks should account for quick conversions and may include supersets and circuit stations to exploit rebuilt floor space.
Maintenance schedule and checklist:
- Weekly: inspect locking pins, hinge movement, and visible fastener tightness; wipe clean and apply light lubricant (dry PTFE) to hinges if recommended.
- Monthly: check torque of main fasteners and inspect for paint chips, rust, or deformation.
- Quarterly: cycle the rack through 100 fold/unfold cycles, inspect bushings/bearings and replace worn components before they progress to failure.
Troubleshooting common issues and fixes:
- Wobble or lateral play at hinge: tighten hinge fasteners, inspect bushings, replace worn bushings or pins, and verify mounting bolts are torqued to spec.
- Fasteners pulling out: check for undersized or short fasteners; add backing plates or increase fastener length and grade.
- Hinge seizing or noisy operation: clean and lubricate sealed bearings or replace if corrosion has damaged rolling elements.
Case study 1 — Garage to Hybrid Gym:
A 28-year-old athlete converted a single-car garage into a hybrid gym using a heavy-duty wall mounted folding rack (rated 900 lb) installed on reinforced 2x8 blocking. Installation used eight 3/8" grade-8 through-bolts and two steel backplates. Result: full Olympic lifting capability with the rack folded against the wall during car storage weeks; user reported zero slippage and under 0.5" deflection at 700 lb loaded configuration.
Case study 2 — Small Studio Efficiency Gain:
A boutique studio replaced two freestanding racks with wall-mounted folding racks and freed 18 square meters of floor space, enabling an extra group class and increasing weekly bookings by 17%. They standardized on racks with integrated spotter arms and plate pegs, and implemented a monthly maintenance contract to avoid downtime.
Programming Tips, Accessory Choices, and Visual Layouts
Programming tips: design workouts that leverage rapid transitions—pair strength moves on the wall rack with floor-based conditioning circuits to maximize the utility of reclaimed floor space. Limit heavy singles to sessions when a training partner or spotter arm is available. Accessory recommendations include modular j-hooks, flip-down spotter arms, integrated band pegs, and dedicated plate storage to keep load centered.
Visual layout descriptions: imagine an elevation diagram showing a foldable rack mounted at 7' AFF (above finished floor) with arms extending 48" into the room. In the folded position, the arms rest within a 3" profile. A top-down layout shows a cleared 6' radius around the rack for barbell access when in use. Use these visual cues when measuring and designing your space.
FAQs
1. Are wall mounted folding weight racks safe for heavy lifting?
Wall mounted folding racks can be safe for heavy lifting if installed correctly and if the rack's rated load capacity exceeds the heaviest expected configuration. Important safeguards include anchoring into structural members or concrete with proper fasteners, using blocking where studs are undersized, and adhering to manufacturer torque and installation specifications. For absolute max-safety during heavy singles (near-maximal attempts), many lifters prefer a dedicated power rack with integrated safety pins. When using a wall-mounted folding rack, pair it with spotter arms, use a partner for maximal lifts, and inspect hardware frequently. Safety also depends on user technique, consistent maintenance, and environmental factors (e.g., moisture causing corrosion). If in doubt, consult a structural or mechanical engineer for installations on non-standard walls.
2. What wall types are compatible with folding racks and what anchors should I use?
Compatible wall types include solid concrete, masonry, and wood-stud framed walls with adequate blocking. For concrete, use expansion anchors or epoxy-set stud anchors sized to the rack’s load requirements (commonly 3/8"–1/2"). For wood-stud walls, mount into studs or added blocking with long lag screws or through-bolts; prefer 3/8"–1/2" lags with at least 1.75" embedment into solid wood. Metal studs alone are generally insufficient for heavy-duty racks unless backed by engineered steel backing plates or attached to structural framing. In rental or thin-wall scenarios, avoid heavy installations without landlord permission and professional consultation. Always follow the rack manufacturer’s anchor recommendations and consult local building codes.
3. How much weight capacity do I need for a wall mounted folding rack?
Determine the maximum combined load you plan to attach to the rack: include barbell, plates, attachments, and any users applying dynamic loads. Typical devices range from 300–1,000 lb capacity. For recreational lifters, a 500–700 lb rated rack often suffices. Serious powerlifters and commercial facilities should target 800–1,000 lb or higher ratings, and use multiple mounting points and through-bolting. Always add a 20–30% safety margin to account for dynamic loads and potential misuse. If you anticipate future increases in training intensity, choose the higher-rated option from the outset to avoid expensive retrofits.
4. Can I install a folding rack on a finished drywall without removing drywall?
It is possible to mount on finished drywall, but the fasteners must anchor into studs or blocking behind the drywall. If studs align with the rack’s mounting pattern and are structurally adequate, you can use long lags through the drywall into the studs. For heavy-duty racks, access behind the drywall to install solid blocking and through-bolts is recommended for maximum strength. Avoid relying solely on drywall anchors or toggles for high-load installations; these are not rated for long-term heavy dynamic loads common in weightlifting. If you cannot access studs or add blocking without removing drywall, consider alternative solutions such as a free-standing rack or professional installation to add structural backing.
5. What maintenance should I perform and how often?
Establish a simple maintenance routine: weekly visual checks of locks, pins, and hinges; monthly torque verification of main fasteners; quarterly lubrication or replacement of hinge bushings/bearings as needed. Immediately address paint chips and surface corrosion with sanding and touch-up paint to prevent rust spread. For commercial environments, a maintenance log and quarterly professional inspection reduce the risk of failure. Replace worn pins or components proactively—don’t wait for failure. Keep user instructions and weight limits posted near the rack to minimize misuse.
6. Are there differences between residential and commercial folding racks?
Yes. Commercial racks are typically built with thicker steel, larger welds, sealed bearings, higher-grade fasteners, and higher load ratings. They often include replaceable wear components, integrated safety systems, and comply with commercial-use warranties. Residential models can be lighter, with thinner steel gauges and simpler hinges, and are optimized for cost and home aesthetics. When choosing, match the intended use: high-frequency, heavy-load, multi-user environments require commercial-grade equipment; occasional home use can be met with quality residential models if installation is robust.
7. How do folding racks compare with freestanding power racks for programming?
Folding racks excel at space efficiency and are ideal for routines that require quick conversion of space. They can support most barbell programming but are less ideal for maximal singles unless paired with robust spotter arms or used with a partner. Freestanding power racks provide integrated safety, higher stability, and greater accessory compatibility for advanced lifting techniques (e.g., heavy rack pulls, heavy singles) and typically include more attachment options (monolifts, lat pulldowns). Choose folding racks for space-limited, versatile environments and power racks when maximum safety, stability, and accessory integration are priorities.
8. What accessories should I add to a folding rack for gym versatility?
Recommended accessories include heavy-duty j-hooks, flip-down spotter arms, band pegs, integrated plate storage, barbell holders, and dip attachments if available. Ensure accessories are rated for the rack and properly secured. For rehab or functional training settings, add band pegs and low cross-members for pulley attachments. Opt for modular accessories that are removable to maintain the rack’s fold-flat profile. Label accessory load limits and train staff or household members on correct installation and use.
9. When should I call a professional for installation or inspection?
Engage a professional installer or structural engineer if your wall is load-bearing and you plan to modify framing, if the mounting surface is non-standard (thin masonry, unreinforced block), or if you intend to install racks with ratings above 800–1,000 lb. Also call a pro if you notice unusual deflection, repeated fastener loosening, or concrete cracks near anchor points. Professional installation ensures proper blocking, anchoring, and compliance with local building codes, and is a wise investment for commercial facilities and heavy-use residential installations.