
Complete Guide to Weight Bar and Weights: Selection, Technique, Maintenance, and Applications
Choosing and Understanding Weight Bar and Weights
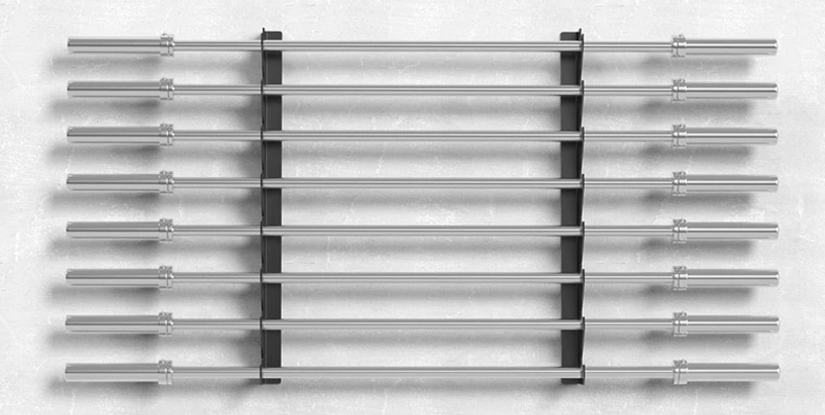
Selecting the right weight bar and weights is the foundation of an effective strength program. A typical Olympic men's bar measures 2.2 m (7.2 ft) and weighs 20 kg (44 lb); women's Olympic bars are usually 2.01 m and weigh 15 kg (33 lb). Sleeve diameter for Olympic bars is standardized at 50 mm to accept 50 mm (2 in) bumper plates, while standard home-gym bars often use 25 mm sleeves and smaller plates. When comparing bars, a key metric is tensile strength, commonly expressed in KSI (kilo-pounds per square inch). Entry-level bars often range 120–160 KSI, mid-tier 160–190 KSI, and high-end powerlifting/competition bars can exceed 200 KSI. Higher tensile strength correlates with greater resistance to permanent bending under heavy loads.
Plates come in several materials and profiles. Cast-iron plates are economical for general training. Bumper plates, made of dense rubber and usually calibrated to a 450 mm diameter, are required for Olympic-style lifts and drop training because they protect flooring and allow consistent bar height. Fractional plates (1.25–2.5 kg) enable small load increments for linear progression. Key specifications to check when buying: inner hole diameter (50 mm for Olympic), tolerance/calibration (precision plates list exact weights), and whether plates are coated (e.g., chrome, rubber, or polyurethane) for corrosion resistance and longevity.
Practical purchasing guidance:
- Match bar sleeve diameter to plate inner diameter: 50 mm sleeves for Olympic plates, 25–28 mm for standard plates.
- For general strength and power training, choose an Olympic bar with 190–205 KSI tensile strength and sturdy bushings or bearings based on lift preference (bushings for squats, bearings for snatch/clean rotation).
- Home gyms: a 20 kg Olympic bar plus 100–120 kg of plates (e.g., two 20 kg, two 15 kg, two 10 kg, two 5 kg, two 2.5 kg, four 1.25 kg) gives versatility and progression; if space is limited, consider a 50–60 kg starter set.
Real-world statistics: a 2019 equipment survey of 250 home-gym owners reported that 68% purchased Olympic bars and bumper plates, citing versatility and long-term value; 22% opted for standard bars due to lower cost. Budget considerations are practical: a quality 20 kg bar typically costs $120–$350 depending on brand and construction, while a set of bumper plates for 100 kg can cost $400–$900. Weigh choices against training goals: powerlifters may prioritize stiff, knurled power bars, while CrossFit and Olympic lifters often prefer more whip and a rotating sleeve.
Types of Bars and Plates: Features and Use Cases
Understanding the types of bars and plates clarifies purchase decisions. Common barbells include Olympic bars (general-purpose lifts, competition), powerlifting bars (stiffer, extra-thick 29 mm+ shaft and aggressive knurl for heavy squats, presses, and deadlifts), technique bars (lighter, used for learning movement patterns), and specialty bars like trap (hex) bars, safety squat bars, and cambered bars for targeted adaptations. Each bar’s knurling pattern, shaft diameter, and whip will influence grip, control, and performance during high-load or high-velocity movements.
Plates: standard cast iron, Olympic iron, bumper plates (competition-grade: all rubber and calibrated to +/- 10g for 15–25 kg plates), change plates, and calibrated steel plates for competitions. Bumper plates are preferred where dropping the bar is common: Olympic lifts and high-intensity sets. Competition-grade plates maintain a 450 mm diameter across weights to keep consistent bar height; cheaper plates vary diameters which affects lift dynamics.
Selection checklist (quick):
- Bar type vs training: choose power bar for max strength, Olympic bar for technique and versatility.
- Bumper vs iron plate: bumper for dropping; iron if budget and not dropping weights.
- Check warranties and finish — zinc/chrome for corrosion resistance, black oxide for less glare.
Materials, Load Capacity, and Measurements
Details in construction determine long-term performance. Shaft diameter matters: men’s Olympic bars are typically 28–29 mm; women’s around 25 mm. Bearing vs bushing systems affect sleeve rotation: bearings (sealed) offer smoother rotation, ideal for high-speed Olympic lifts, while bushings (brass or composite) are durable and often preferred in powerlifting settings where rotation is less critical. Load capacity is influenced by tensile strength and whip; a bar rated for 680–900+ lbs (310–410+ kg) suits most lifters, while competition and heavy commercial bars may be rated higher. Most manufacturers list maximum recommended load—use this as a guideline but inspect for wobble or bending over time.
Practical measurement examples: if you purchase a 20 kg Olympic bar with 190 KSI rating and a set of 20 kg rubber bumper plates (pair), the barbell rigged with a full 200 kg load will maintain structural integrity under dynamic lifts if assembled and used per manufacturer instructions. When mixing plates, be mindful of balance: symmetrical loading and using collars prevents sleeve slippage and uneven stress on sleeves.
Programming, Techniques, and Safety with Weight Bar and Weights
Effective training with a weight bar and weights requires precise programming, consistent technique, and robust safety practices. Programming must align with goals: hypertrophy (8–12 reps, 60–80% 1RM, higher volume), strength (1–5 reps, 80–95% 1RM, longer rest), power (1–6 reps with explosive intent, 30–60% for velocity training or 70–90% for power output). A common model is linear progression for novices: increase 2.5–5 lb (1.25–2.5 kg) per session for upper body lifts and 5–10 lb (2.5–5 kg) for lower-body lifts until progress stalls, then shift to periodization (e.g., 4-week blocks: accumulation, intensification, realization).
Technique examples: the squat demands neutral spine, hip-drive, knee tracking over toes, and full-depth tailored to mobility. The deadlift requires locked scapula, hip hinge, and leg drive. Bench press emphasizes scapular retraction, stable foot placement, and controlled bar path. Incorporate accessory work: Romanian deadlifts for posterior chain, paused squats for sticking points, and rows for upper-back stability.
Safety practices:
- Use collars for all sets; spring or locking collars reduce plate creep and load imbalance.
- Spotters or safety pins/racks for heavy bench and squat work — set pins to catch bar safely at failure height.
- Progressive overload with micro-loading (1.25–2.5 kg plates) to reduce injury risk while maintaining progression.
- Warm-up protocol: 5–10 minutes of general activity (light cardio), followed by dynamic mobility and specific ramp-up sets (3–5 sets gradually increasing to working weight).
Step-by-Step Technique Guides for Key Lifts
Squat (barbell back squat) step-by-step:
- Set the bar at mid-chest height on a power rack and position feet under bar; step under and place bar across upper trapezius (high-bar) or rear deltoids (low-bar).
- Grip the bar tight, retract scapula, take feet shoulder-width with toes slightly out.
- Unrack by extending hips and knees, take one step back, establish stance, brace core, inhale deeply.
- Initiate descent by pushing hips back and hinging; maintain neutral spine and knee tracking; descend to target depth (parallel or below as mobility allows).
- Drive up through midfoot and heels, lead with chest, exhale after lockout.
Bench press tips:
- Feet planted, hips slightly arched (for competitive powerlifting), scapula retracted to provide stable base.
- Bar path: lower to sternum (nipple line) and press slightly back toward rack for an efficient motion.
- Spotter presence for heavy singles; use safety pins at an appropriate height.
Deadlift essentials:
- Hips hinge correctly; set back angle to maintain bar close to shins; shoulders slightly in front of bar at start.
- Engage lats, pull slack out of bar, drive feet into floor, extend hips to stand, maintain neutral spine throughout.
Safety Checklist, Collars, and Progressive Overload Best Practices
Implement a safety checklist before heavy sessions: inspect bar and plates for cracks or significant rust, verify collars lock securely, check rack pins and safety bars, and ensure floor protection for potential drops. Collars are non-negotiable; slipping plates change leverage and can produce asymmetric loads that increase injury risk. Types include spring collars (fast and cheap), lockjaw/plastic clamps (convenient), and Olympic-style threaded collars (secure for heavy loads).
Progressive overload best practices:
- Use microplates (0.5–2.5 kg) to maintain frequent small increments and avoid abrupt jumps in load.
- Track metrics: sets x reps x load and RPE (rate of perceived exertion). If RPE increases across sessions at the same load, consider deloading or reducing volume.
- Include deload weeks every 4–8 weeks depending on intensity to reduce injury risk and promote long-term gains.
Practical monitoring: log barbell lifts and note any bar wobble or sleeve play. Replace worn collars or bars showing permanent bend (visible without load) and consult manufacturer limits for warranty claims.
Maintenance, Storage, and Case Studies
Proper maintenance and storage of a weight bar and weights extends equipment lifespan and reduces safety risks. Routine inspection frequency: quick visual check before each session and a detailed inspection monthly for commercial use (weekly for high-traffic gyms). Look for sleeve play, stripped threads on collars, knurl wear, corrosion, and cracks in cast plates. For rust removal use a nylon brush and light oil (3-in-1 or bike chain oil) rather than harsh abrasives that remove protective finishes. For bars with bearings, avoid getting oil into seals; use manufacturer-recommended lubricants and service intervals (often annually for moderate home use, quarterly for heavy commercial use).
Storage solutions preserve space and protect equipment: vertical plate trees, horizontal racks, and wall-mounted bar holders. Use rubber or plywood flooring under heavy lifting areas to protect both floor and plates. Label loads and store bumper plates by weight color coding (standard competition colors: red-25 kg, blue-20 kg, yellow-15 kg, green-10 kg) — this speeds changeovers and reduces mismatched sets during classes or competitions.
Maintenance checklist:
- Monthly: inspect bar straightness (roll on flat surface), check sleeve rotation, tighten loose end-caps.
- Quarterly: clean knurl with dry brush, lightly oil bar shaft and sleeves per manufacturer guidance, inspect plates for hairline cracks.
- Annually: deep service (disassemble sleeves if applicable) for heavy-use bars with bearings; replace bushings as needed.
Maintenance and Inspection Protocols
Step-by-step maintenance protocol (monthly):
- Visually inspect the bar and plates for visible damage; roll the bar on a flat surface to detect bends; if wobble is present at rest, escalate to professional evaluation.
- Clean: wipe shaft and sleeves with a dry cloth; use a brass brush for knurling to remove chalk and debris.
- Lubricate: apply a light film of machine oil to sleeve bushings/bearings only as recommended — avoid over-lubrication which attracts dust.
- Test collars: ensure they lock tightly; replace if springs are weak or clamps no longer hold under load.
Visual element description: imagine a maintenance checklist poster placed near gym rack showing items: "Roll bar check, Knurl brush, Sleeve rotation, Collar test, Plate crack check" with icons for each—this increases compliance and safety awareness among users.
Case Studies: Home Gym Setup and Commercial Gym Retrofit
Case Study 1 — Home Gym Setup (Budget-conscious): A 32-year-old amateur lifter aimed for a versatile home setup at $800 budget. Chosen kit: 20 kg Olympic bar ($180), 100 kg iron plates mix ($300), basic spring collars ($20), rubber flooring ($300). Outcome over 12 months: consistent linear progression from a 100 kg deadlift to a 200 kg deadlift and measurable gains in squat and press. Key lesson: prioritize a reputable bar and accurate plates; cheaper bars developed sleeve wobble at 120–140 kg, lesson learned was to invest early in quality for long-term reliability.
Case Study 2 — Commercial Gym Retrofit (ROI focus): A mid-size gym retrofitted 12 lifting stations with Olympic bars (12 x $220), 900 kg of calibrated bumper plates, and upgraded racks, total equipment cost $45,000. They tracked member class utilization and retention over 18 months: strength class enrollment rose 28%, membership churn decreased by 12%, and new premium memberships increased revenue by $18,000/year. Equipment downtime dropped by 40% after switching to commercial-grade bars with sealed bearings and scheduled maintenance protocols. Practical insight: investing in higher-spec bars and maintenance programs yields measurable ROI through increased utilization and member satisfaction.
FAQs: Professional Answers About Weight Bar and Weights
FAQ Set 1: Bar Compatibility and Weight Standards
Q1: Can I use Olympic plates on a standard bar? A1: No — Olympic plates require a 50 mm sleeve diameter and will not fit tightly on a smaller standard bar with a 25–28 mm sleeve. Attempting to force plates can damage equipment and create safety hazards. Use a bar and plates that match sleeve and hole specifications. Q2: What are common plate increments and why are fractional plates important? A2: Common increments include 1.25 kg, 2.5 kg, 5 kg, 10 kg, 15 kg, 20 kg, and 25 kg. Fractional plates (1.25–2.5 kg) are critical for steady progression, especially when lifters are near plateaus or following conservative strength programs where small increases maintain technique and reduce injury risk.
FAQ Set 2: Bar Construction and Performance
Q3: How important is bar tensile strength? A3: Tensile strength indicates resistance to permanent deformation; higher KSI means the bar withstands heavier loads without bending. For most lifters, 190–205 KSI offers an optimal balance of durability and cost. Q4: Are bearings necessary? A4: Bearings provide smoother rotation and benefit Olympic lifts where rapid sleeve rotation is needed. For powerlifting and general strength training, bushings are durable and sufficient. Choose based on training modality and budget.
FAQ Set 3: Safety, Collars, and Load Management
Q5: Do I need collars for light sets? A5: Yes — collars prevent plate creep and sudden imbalances even during lighter sets; they're inexpensive insurance. Q6: How often should I check my bar for damage? A6: Quick visual checks each session and a detailed monthly inspection are best practice. Heavy-use facilities should perform weekly inspections and maintain documented service logs.
FAQ Set 4: Plates Types and Use Cases
Q7: When should I choose bumper plates over iron plates? A7: Use bumper plates if you or your program involves dropping the bar (Olympic lifts, high-intensity sets). Bumpers protect flooring and prolong bar and sleeve life. Iron plates are economical if you never drop the bar and floor protection is sufficient. Q8: What is plate calibration and why does it matter? A8: Calibrated plates list precise weight tolerances (e.g., +/- 10 g for competition plates). They matter in competitive contexts and when precise load increments are necessary for testing or performance tracking.
FAQ Set 5: Storage, Maintenance, and Troubleshooting
Q9: Best storage methods for a mixed plate collection? A9: Use designated trees/racks and separate plates by size and material. Color-code bumpers by weight and store iron plates on horizontal racks to prevent floor corrosion. Q10: My bar has slight bend — when to replace? A10: Minor warp detectable only under heavy load may be tolerable for non-competitive settings, but visible bending at rest, significant sleeve wobble, or compromised knurling warrants replacement or manufacturer evaluation. Always prioritize safety; recurring issues after service mean replacement.