
Weight Lifting Racks and Cages: Selection, Safe Use, and Maintenance Guide
Choosing the Right Weight Lifting Racks and Cages for Your Facility
Selecting the appropriate weight lifting racks and cages is a foundation-level decision for any home setup, boutique studio, or commercial fitness facility. The right choice balances load capacity, footprint, user flow, and accessory compatibility. Begin by mapping your needs: who will use the equipment (novices, intermediate lifters, strength athletes), peak-hour throughput, floor space and ceiling height, and budget. Typical parameters to consider include load capacity, dimensions, uprights and hole spacing, materials and finish, and certification for commercial use.
Key technical specifications that influence selection:
- Load capacity: Home racks commonly rate between 500–1,000 lb (227–454 kg); commercial racks typically exceed 1,000 lb and often list 1,500–2,000+ lb (680–907+ kg) capacities.
- Dimensions: A full power rack footprint is often 4 ft × 4 ft (1.2 m × 1.2 m); height ranges from 84 in (7 ft / 2.13 m) to 96 in (8 ft / 2.44 m). Half-racks and squat stands have smaller footprints but reduced accessory support.
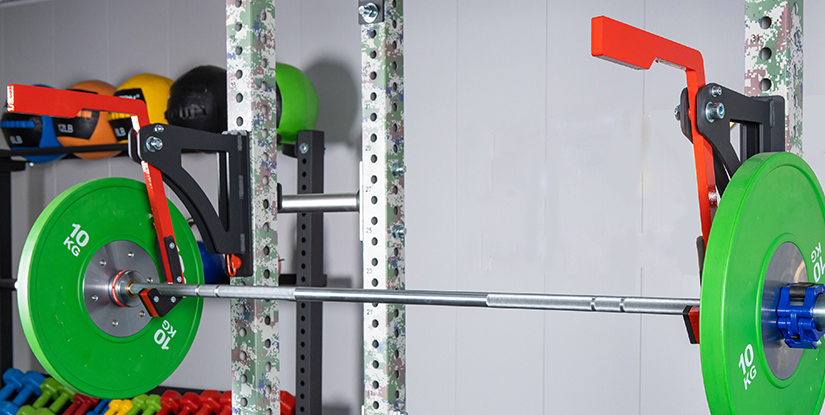
- Compatibility: Olympic sleeve diameter is 50 mm (2 in) and plates are typically 2 in (50 mm) hole; ensure bar sleeve clearance and J-cup design match your bars and collars.
- Upright hole spacing: Common spacing is 1 in or 2 in increments to allow fine adjustment of safety pins and J-cups.
- Material and finish: 11–3/4 gauge to 7-gauge steel is common for uprights; powder-coating and galvanized finishes resist corrosion in high-use environments.
Budgeting tips and procurement strategy include prioritizing structural integrity (upright gauge and weld quality) over cosmetic extras. For commercial buyers, opt for models with commercial warranties and third-party certifications. For home users, evaluate modularity: removable pull-up bars, band pegs, plate storage, dip attachments, and spotter arms extend the rack's utility without requiring new purchases. Allow at least 2 ft (0.6 m) clearance in front and behind the rack for barbell movement and safe loading.
Real-world selection examples:
- Home gym: A 600–800 lb rated power rack with 84 in height, removable pull-up bar, and 2–3 plate-storage pegs provides a compact, versatile solution.
- Boutique studio: A modular half-rack system with quick-adjust J-cups, band pegs, and integrated storage optimizes space and supports high turnover classes.
- Commercial facility: Full cages with 11-gauge uprights, modular attachments, and heavy-duty safety spotter arms minimize downtime and support high-frequency use.
Procurement checklist (quick): verify load capacity, confirm plate and bar compatibility, measure ceiling height and floor anchors, prefer warranty and spare-parts availability, and ask for assembly diagrams and anchoring requirements before finalizing.
Types, Dimensions, and Load Capacities (Practical Details)
Understanding the differences between rack types helps match equipment to programming goals. Power racks (full cages) provide the most safety and accessory options for heavy squats, bench presses, and Olympic accessory work. Squat stands and half-racks save footprint and cost but often sacrifice integrated safety beyond spotter arms. Rig-style cages expand functional training possibilities (pull-ups, rig attachments, multi-station configurations) and are popular in high-throughput commercial spaces.
Dimension and capacity guidelines give practical boundaries when planning floor layouts. For heavy barbell work, plan on at least a 4 ft × 6 ft operational area per rack to accommodate the bar and lifter. Uprights typically have 1 in or 2 in hole spacing; choose closer spacing for finer safety adjustments for Olympic and powerlifting athletes. Rating examples: 5x5 mm or 11-gauge steel uprights are suitable for most commercial uses; home users can safely use 7–9 gauge. Remember that rated capacity is often distributed load—dynamic shock loads during ballistic lifts can exceed static ratings, so use safety pins and proper technique to mitigate risk.
When comparing models, request technical drawings showing anchor points and required clearance, and ask suppliers for a load test certificate if available. If installing on raised platforms or wooden subfloors, plan for supplemental steel plates or bolted anchoring to distribute load and prevent floor damage.
Safe Use, Programming, and Maintenance for Long-Term Value
Safety, programming, and maintenance are interconnected priorities that determine equipment lifespan and user outcomes. A rack is only as safe as its installation, the program that uses it, and the maintenance routine that preserves it. Start with an installation audit: confirm floor anchoring, verify upright verticality using a level, and ensure J-cups and safety pins seat fully without wobble. For commercial settings, post visible load limits and clear usage guidelines near each rack.
Programming around racks should include session flow plans to limit conflicts. For example, structure peak-hour zone assignments—one rack dedicated to squats, another to bench press, and a rig for pull-ups—to maximize throughput. Use simple rules: 10–15 minute maximum station blocks during peak times, pre-booked time slots for heavy lifts, and designated warm-up areas with lighter bars and clips to keep the rack area available for loaded work.
Maintenance and inspection are practical tasks that preserve safety and value:
- Daily: quick surface inspection for loose bolts, unusual noises, and cleanliness.
- Weekly: check J-cup liners, safety pin alignment, and visible wear on band pegs and welds.
- Monthly: torque critical bolts to manufacturer specs, lubricate pivot points, and inspect powder coat for chips that could corrode steel.
- Annually: full structural audit by trained technician, re-tighten anchor bolts, and replace high-wear accessories (J-cups, band pegs, safety straps) as needed.
Step-by-step safe setup and usage guide:
- Measure ceiling height and floor flatness; plan footprint and clearances.
- Unpack and inventory parts; consult assembly manual and photos before starting.
- Assemble uprights and crossmembers on a flat surface; pre-fit bolts before final torque.
- Anchor to concrete using the specified anchor bolts; for wooden subfloors use steel base plates distributed across joists.
- Test safety pins and J-cups with incremental weights before full-loading; observe for deflection and unusual movement.
- Develop and post usage rules; train staff and regular users on setting safeties and spotting alternatives (safety straps and adjustable spotter arms).
Setup, Safety Checklist, and Maintenance Schedule (Actionable Tips)
Use this actionable checklist when commissioning or inspecting a rack:
- Verify uprights are plumb (use a level) and base plates are flush with the floor.
- Confirm anchor bolt length and torque meet manufacturer guidelines; for concrete use chemical anchors in cracked slabs cautiously.
- Inspect welds for hairline cracks and check powder coat for chips; treat and touch-up exposed metal to avoid rust.
- Replace worn J-cup liners and ensure safety pins lock in place; test with a bar loaded to 50% of expected maximum lift before real use.
- Schedule documented inspections: daily visual checks by staff, monthly hands-on tightening, and annual professional audits.
Best practices for longevity include avoiding repeated high-impact drops inside a rack with minimal padding (use proper bumper plates), rotating high-wear components regularly, and maintaining a parts inventory (extra J-cups, bolts, and safety straps) to reduce downtime. For commercial facilities, maintain a log of maintenance actions tied to each rack serial number to meet insurance and warranty requirements.
FAQs
This FAQ section addresses technical, installation, and operational questions commonly raised by facility managers and home lifters. Answers emphasize standards, practical steps, and risk mitigation to support informed decisions.
Q: What is the minimum ceiling height for a full power rack? A: A minimum of 8 ft (96 in / 2.44 m) is recommended for versatility; 7 ft (84 in / 2.13 m) can work for many users but limits overhead movement and pull-up variations.
Q: How do I verify a rack's load rating is accurate? A: Request manufacturer test documentation; inspect material gauge and weld quality; for critical installations consider third-party load testing.
Q: Can I use a rack on a raised platform? A: Yes, but distribute anchor loads with a steel subplate and ensure platform structural members carry the dynamic loads of dropped or heavily loaded bars.
Q: How often should safety straps or spotter arms be replaced? A: Replace at first sign of significant wear; consider a scheduled replacement every 12–24 months in high-use commercial settings.
Q: Are cheaper racks safe for heavy lifting? A: Some budget racks are safe for moderate loads if properly assembled and anchored; for heavy or competitive lifting choose racks with thicker uprights, higher rated loads, and commercial warranties.
Q: What attachments give the best ROI for a multipurpose rack? A: Pull-up bars, plate storage pegs, dip handles, safety straps, and landmine attachments typically deliver the most program versatility per dollar.
Q: How should racks be spaced in a commercial gym? A: Allow a minimum 4 ft width and 8–10 ft front clearance per rack for barbell work; increase space for high-traffic zones or class-based programming.
Q: What record-keeping is recommended for warranty and safety compliance? A: Maintain installation photos, serial numbers, a dated inspection log, torque values for anchors, and records of part replacements.