
Choosing and Using a Weight Rack for Plates: Practical Guide for Home and Commercial Gyms
Why a Weight Rack for Plates Matters: Benefits, Types, and Key Specifications
A weight rack for plates is not merely a storage accessory — it is a foundation of gym organization, safety, and operational efficiency. Proper plate storage reduces trip hazards, minimizes plate damage, and extends the usable life of expensive bumper and iron plates. For commercial gyms, a well-designed plate rack speeds equipment turnover and supports high user throughput; for home gyms it maximizes limited space and keeps workouts focused.
Benefits are measurable. A compact vertical plate tree can save roughly 2–4 square feet of floor space compared to leaving plates on the floor around a bench or barbell. In commercial settings, dedicated racks reduce plate misplacement: operators report up to a 30% reduction in time staff spend re-racking plates when effective storage systems are installed. Typical specifications to compare include capacity (weight load), peg diameter and spacing, overall footprint, and construction material — commonly powder-coated steel or stainless steel for high-corrosion environments.
Common types of weight racks for plates and their use cases:
- Vertical plate trees: Compact, 4–8 pegs, best for home gyms and small studios. Typical capacity: 300–1,200 lbs total.
- Horizontal plate racks: Multi-tiered shelves or pegs at waist height, ideal for frequent access in commercial gyms. Capacities often 1,000–4,000 lbs.
- Combination racks: Include storage for plates, bars, and accessories; space-efficient for crossfit and functional fitness areas.
- Bumper plate towers: Tall, narrow units for 2" Olympic-style bumper plates — useful for Olympic lifting platforms where plates must be swapped quickly.
Key specifications to evaluate with examples:
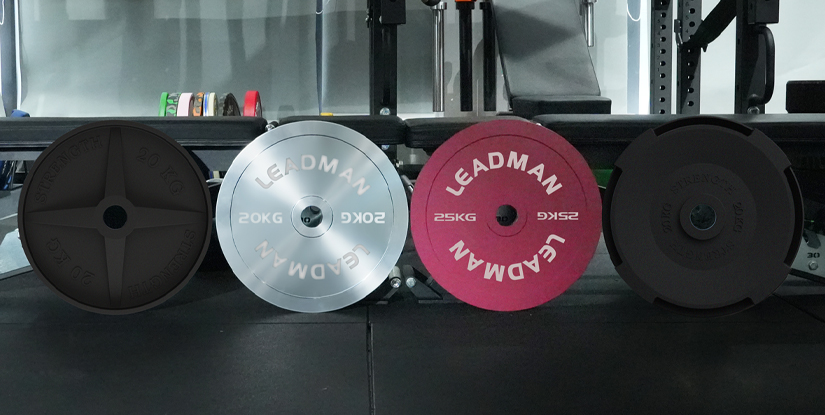
- Peg diameter: Olympic plates require ~2" (50.4 mm) sleeves; smaller 1" (25.4 mm) pegs are for standard plates. Some racks have dual-size sleeves or adapters.
- Capacity per peg: Often 200–500 lbs; confirm load rating per peg and overall structure. A commercial horizontal rack might list 4,000 lbs total with 10 pegs rated at 400 lbs each.
- Footprint: Horizontal racks range 48"–96" wide; vertical trees can be under 24" in diameter. Choose based on traffic patterns and clearance around equipment.
- Material & finish: Powder-coat resists chips and rust; stainless steel preferred for outdoor or humid environments.
Visual elements description: imagine a garage with a 6-peg vertical tree beside a squat rack (pegs arranged at 3 heights); contrast that with a commercial 8-shelf horizontal rack against a wall, each shelf labeled by plate diameter. These layouts influence workflow — vertical trees keep plates near lifting platforms, horizontal racks create an organized free-weight zone.
Actionable takeaway: inventory your plates (count of 2" vs 1" holes, bumper vs iron, diameters), measure available floor and wall space, and select a rack that matches plate hole size and cumulative weight. For mixed plate sets, choose racks with adaptable sleeves or purchase a small set of sleeve adapters to standardize fit.
Types of Plate Racks: Pros, Cons, and Example Applications
Understanding types helps match a rack to your gym’s workflow. Vertical trees are low-cost, portable, and space-saving — pros include compact footprint and low price (often $60–$250 retail). Cons: limited capacity per peg and potential for imbalance if plates are unevenly loaded. Practical example: a home user with four 45-lb plates each side (360 lbs total) can store on a 6-peg tree with room for collars and smaller plates.
Horizontal racks (shelf-style or peg rows) offer rapid access and even distribution. Pros: higher capacity, easier to grab specific plate sizes, better for busy environments. Cons: larger footprint and higher initial cost ($300–$1,500 depending on size and brand). Example: a boutique gym with 25 members during peak hours might use a 10-peg horizontal rack to minimize wait time between sets.
Bumper towers and wall-mounted racks are specialized: bumper towers streamline loading/unloading during Olympic lifts; wall racks free up floor space but must be installed on load-bearing surfaces. Installation example: anchor points and lag bolts rated for 300–500 lbs per bracket are standard; always follow manufacturer torque specs.
Key Specifications and Materials: How to Read a Product Sheet
When comparing models, read the product sheet like an engineer. Identify: overall weight capacity, per-peg capacity, peg length (longer pegs prevent plates from banging), peg diameter, distance between pegs (minimum 4.5" for 45-lb plates to avoid overlap), and finish. Example spec interpretation: “10-peg horizontal rack, 4,000 lb capacity, 10" peg spacing, 2" sleeves, powder-coat” means each peg likely rated ~400 lbs and will hold Olympic plates without crowding.
Material considerations: 11–14 gauge steel is common for commercial units; heavier gauge equals more durability. Corrosion resistance: choose powder-coat for indoor gyms, hot-dip galvanizing or stainless steel where humidity or chlorinated environments exist. Lifetime expectations: a well-maintained commercial steel rack can last 7–15 years; corrosion-prone environments can halve that lifespan without proper finish.
Selecting the Right Weight Rack for Plates: Practical Buying Guide and Best Practices
Choosing the right rack requires a stepwise approach. Start by auditing your plate inventory: list quantities by size (e.g., 45 lb (20.4 kg), 35 lb, 25 lb, 10 lb, 5 lb, 2.5 lb) and by plate hole type (2" Olympic vs 1" standard). Next, map your floorplan — note dimensions and traffic flow. Consider three buyer profiles with example choices:
- Home lifter (limited space, 300–600 lbs total): 6–8 peg vertical tree or compact horizontal rack.
- Boutique studio (moderate throughput, 1,000–3,000+ lbs): horizontal peg or multi-tier shelf with labeled positions for fast access.
- Commercial gym (high throughput, 3,000–10,000+ lbs): heavy-duty horizontal racks, multi-station storage, and redundant racks positioned near each lifting station.
Step-by-step buying guide:
- Inventory plates and verify hole diameters.
- Measure available space: height, width, depth, and clearance for movement (reserve 36"–48" around racks in busy areas).
- Decide capacity target: multiply plate weight totals plus 20% buffer for future growth.
- Choose rack type based on usage patterns: vertical for infrequent or aesthetic use, horizontal for speed and volume.
- Confirm installation needs: wall-mount vs freestanding; check floor flatness for stability.
- Compare finishes and warranty: commercial racks often come with 5–10 year warranties.
Best practices and practical tips:
- Label pegs by plate size (adhesive vinyl or engraved tags) to enforce re-racking discipline.
- Distribute weight evenly across pegs to avoid tipping — for vertical trees, alternate sides as you load plates.
- Use rubber-capped feet or pads to protect flooring and reduce movement.
- For mixed plate sets, employ 2" sleeve adapters for standard plates rather than forcing them onto oversized pegs.
Example purchase decision: a 24’ x 20’ garage gym with a 500 lb plate collection may opt for one 8-peg horizontal rack (rated 1,600 lbs) placed along the wall and a 4-peg vertical tree near the squat rack for overflow and quick access. This configuration balances capacity, workflow, and cost (~$250–$700 total depending on brand).
Sizing, Capacity, and Compatibility: Technical Calculations and Examples
Precise sizing avoids surprises. Calculation example: if you own 12 × 45 lb plates, 6 × 25 lb, and 8 × 10 lb plates, total weight = (12×45) + (6×25) + (8×10) = 540 + 150 + 80 = 770 lbs. Add 20% buffer → 924 lbs minimum rack capacity. If using pegs, allocate plates to pegs to keep per-peg load under rated values (e.g., 4 pegs rated 400 lbs each can comfortably hold 924 lbs distributed across them).
Compatibility checklist:
- Hole size: 2" for Olympic — confirm peg sleeve diameter matches.
- Plate diameter: larger plates (45 lb bumpers) need at least 4.5" spacing between pegs to avoid stacking interference.
- Floor load: concentrated loads can stress gym flooring; consider a spread-footed rack or floor protection mats if placing on plywood or raised floors.
Safety, Stability, and Installation: Best Practices and Step-by-Step Setup
For safety, inspect rack welds, bolt tightness, and peg endcaps upon delivery. Installation steps for freestanding horizontal racks:
- Choose a flat surface; verify with a 4-ft level.
- Assemble per manufacturer instructions; torque bolts to specified Nm values.
- Place rubber feet or anchored plates under legs to prevent movement; for heavy loads, anchor to floor where allowed (use expansion anchors rated for the expected shear load).
- Load plates progressively, testing stability after every 200–300 lbs added.
For wall-mounted racks, locate studs or structural backing and use lag bolts rated for at least the advertised capacity. Test anchorage with a static test load equal to 125% of expected maximum to confirm safety margin. Record installation dates and inspection logs; recommended inspection interval is monthly in high-traffic gyms, quarterly for home use.
Using and Maintaining Your Weight Rack for Plates: Setup, Organization, and Longevity
Proper use and maintenance extend rack life and ensure a safe environment. Initially set up an organizational system that matches workout patterns: place most frequently used plates (45 lb / 20.4 kg) at mid-height for ergonomic access; smaller plates and collars can go on top shelves or front pegs. Implement a visual labeling system: color-coded vinyl strips, printed labels, or chalkboard signage. This reduces search time and speeds transitions during classes or circuit training sessions.
Routine maintenance tasks include wiping down surfaces weekly, inspecting welds and bolts monthly, and touching up powder-coat chips promptly to prevent rust. Lubricate any moving parts (e.g., sliding sleeves) with a light silicone spray annually. Recordkeeping: maintain a maintenance log with dates and actions; this is especially important for insured commercial gyms and can be required by liability policies.
Organizational tips with examples:
- Zone storage: allocate racks to zones — lifting platform, squat area, and cardio area — to minimize cross-traffic.
- FIFO rotation for bumper plates: place newly purchased bumpers at back of tower to cycle wear evenly.
- Use colored collars or tags to mark teams or class stations during group sessions to streamline setup.
Step-by-step daily protocol for gym staff (example):
- At opening, check racks for loose plates and ensure even distribution.
- Mid-shift, perform a walk-through to re-rack stray plates and note any damage.
- Closing: sweep area, wipe down rack surfaces, and log any maintenance needs.
Longevity indicators: minor paint chips are cosmetic; structural bending, wall separation, or cracked welds require immediate removal from service. Replacement timeline: expect hardware such as rubber feet and endcaps to need replacement every 1–3 years under heavy use; structural frames can last a decade or more with proper care.
Organizational Systems and Workout Flow: Designing Efficiency
Efficient workflow reduces downtime between sets. A simple layout example for a 2,000 sq ft gym: designate one 8-peg horizontal rack per 400–500 sq ft of free-weight space. Position racks so that the busiest exercises (squats, deadlifts) have immediate access to 45s and 25s. Use numbered pegs tied to programming: e.g., Program A uses Pegs 1–4 for 45s and 25s, Program B uses Pegs 5–8 for lighter plates. Visual cues like floor tape or labels improve compliance.
Implementing these systems can reduce average time per plate change by 20–40% during classes and competitions. For example, a CrossFit-style class with timed ladders saved an average of 30 seconds per athlete per round after introducing labeled racks and station-specific plate sets.
Maintenance, Inspection, and Troubleshooting: Checklist and Repair Tips
Monthly inspection checklist (practical):
- Check bolt torque and tighten if >10% loosening detected.
- Inspect welds for hairline cracks; use dye-penetrant inspection if concerned.
- Verify peg sleeves for bending and replace if deflected >2 mm.
- Examine coating for corrosion; treat small rust spots with wire brush and touch-up paint.
Troubleshooting common issues: wobble — tighten bolts and confirm floor level; peg wear — replace sleeves or use sleeve adapters; uneven loading — educate users with signage and staff enforcement. Keep spare parts (endcaps, bolts, adhesive labels) on-site to minimize downtime.
Case Studies, Real-World Applications, and Cost Analysis
Examining real-world scenarios helps translate specs into decisions. Below are two case studies and an indicative cost and ROI analysis to guide purchases.
Case Study 1 — Home Gym Optimization: A 250 sq ft home garage with a serious amateur lifter storing 600 lbs in plates. Problem: plates on the floor caused clutter and limited space for deadlifts. Solution: installed a 6-peg vertical tree (capacity 1,200 lbs) and a small horizontal 4-peg rack for bumpers. Result: usable lifting space expanded by ~20%, and workouts became faster due to easier plate access. Total investment: $180 for the vertical tree, $120 for the horizontal rack; payback in time saved and reduced plate damage was immediate.
Case Study 2 — Commercial Gym Workflow Upgrade: A 5,000 sq ft boutique gym with 80 members and high peak usage noticed congestion at the free-weight wall. After auditing, management installed two 10-peg horizontal racks and three bumper towers near lifting platforms. They implemented a visual labeling system and staff enforcement. Result: average time per plate change dropped 35%, class transition times decreased by 12 minutes per session, and customer satisfaction scores for equipment availability rose 18% in three months. Investment: $2,500; estimated annual labor savings and increased throughput produced an effective ROI within 9–12 months.
Cost analysis and budgeting guidance:
- Entry-level vertical trees: $60–$250.
- Mid-range horizontal racks: $300–$1,200.
- Heavy-duty commercial systems and modular racks: $1,200–$5,000+ depending on size and customization.
ROI considerations: calculate direct benefits such as labor time savings, reduced plate replacement costs (less chipping and cracking), and improved member retention due to better facility experience. Example ROI formula: (annual labor and replacement savings + increased revenue from added classes) / rack cost = payback ratio. For the boutique gym above: $800/year saved + $1,200/year extra class revenue = $2,000 annual benefit against a $2,500 investment → ~1.25-year payback.
Home Gym vs Commercial Gym Case Studies: Key Differences and Takeaways
Differences hinge on throughput, durability needs, and space. Home gyms prioritize space efficiency and budget; choose vertical or compact horizontal racks with moderate capacity. Commercial setups must prioritize durability, code compliance, and ease of maintenance. Example takeaway: a commercial operator should over-spec capacity by 30–50% to accommodate peak usage and future expansion, whereas a home owner can match capacity closely to current plate inventory to save cost.
Cost, ROI, and Space Efficiency: Decision Matrices and Example Calculations
Decision matrix factors: initial cost, capacity, footprint, warranty, maintainability. Example matrix weightings might prioritize capacity (30%), footprint (25%), cost (20%), warranty (15%), finish (10%). Use this matrix to score vendor options. Space efficiency calculation example: replacing floor-stacked plates (~6 sq ft) with a vertical tree (<2 sq ft) frees ~4 sq ft — in a $30/sq ft studio that equals $120 worth of usable space reclaimed.
FAQs
This FAQ section provides concise, professional answers to common and technical questions about weight racks for plates. Each answer is grounded in practical experience and industry standards.
-
Q1: What is the difference between Olympic and standard plate racks?
A1: Olympic racks are designed for 2" (50.4 mm) sleeve diameter plates and typically have longer, sturdier pegs. Standard racks fit 1" (25.4 mm) plates. Some racks include adapters to accept both; confirm peg diameter and adapter availability before purchase. -
Q2: How much weight should each peg support?
A2: For commercial use, aim for pegs rated 300–500 lbs each. Home gyms can often use 150–300 lb pegs depending on plate inventory. Always verify the manufacturer’s per-peg rating and factor in a safety margin. -
Q3: Can I anchor a freestanding rack to the floor?
A3: Yes, if permitted by facility regulations. Use expansion anchors or through-bolts rated for shear load and follow manufacturer mounting guidance. For leased spaces, obtain landlord approval prior to anchoring. -
Q4: How should I distribute plates to avoid tipping?
A4: Distribute evenly across pegs and alternate sides on vertical trees. Load heavier plates lower or at mid-height to lower the center of gravity. Avoid loading a single peg with excessive weight beyond its rating. -
Q5: What finish is best for humid environments?
A5: Stainless steel or hot-dip galvanized finishes resist corrosion better than standard powder-coat. If using powder-coat, choose a high-quality finish and perform regular touch-ups on chips. -
Q6: How often should racks be inspected?
A6: Monthly for commercial gyms; quarterly for home gyms. Inspections should include bolt torque checks, weld inspection, and peg sleeve condition identification. -
Q7: Are sleeve adapters safe for converting peg sizes?
A7: Yes, quality steel adapters designed for the load are safe when correctly installed. Verify adapter load ratings and ensure they fit snugly to prevent wobble. -
Q8: How much space do I need around a rack for safe operation?
A8: Maintain at least 36" of clear space around racks; 48" preferred in high-traffic commercial areas to allow plate changes and spotter movement. -
Q9: Can bumper plates be stacked vertically on pegs?
A9: Yes, bumper towers or long pegs are made for stacking rubber bumper plates. Ensure peg length accommodates the stack and that the peg is rated for the cumulative weight. -
Q10: What is the expected lifespan of a commercial plate rack?
A10: With regular maintenance, quality commercial racks last 7–15 years. Environmental factors like humidity and heavy daily use can shorten this; protective finishes and scheduled inspections prolong life. -
Q11: How do I choose between a single large rack or multiple small racks?
A11: Consider traffic flow and redundancy. Multiple racks distributed near lifting stations reduce congestion and keep plate sets closer to athletes. A single large rack saves wall space and may be cheaper but can create a bottleneck during peak times.