
Complete Guide to Weight Lifting with Bar: Equipment, Programming, and Technique
Fundamentals of Weight Lifting with Bar: Equipment, Setup, and Safety
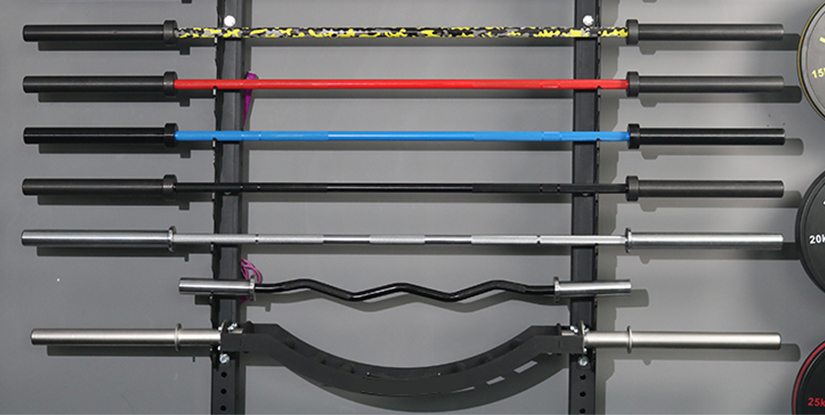
Weight lifting with bar is a foundational method for building muscle, strength, bone density, and functional capacity. This section breaks down essential equipment, correct setup, safety checks, and practical approaches for lifters at every level. The core pieces of equipment include the barbell (standard 20 kg men’s, 15 kg women’s, or specialized technique bars), calibrated plates, collars, a power rack or squat stands, bench, and platform or lifting area. Choose a bar with appropriate knurling and whip for your goals: powerlifting bars are stiffer and have deeper knurling for heavy singles, while Olympic bars have more whip and rotating sleeves for dynamic lifts.
Safety and setup: always inspect the bar and plates for damage, ensure collars are secure, and use a rack at an appropriate height. For compound lifts, position the rack pins so the bar rests near mid-chest for bench or just below shoulder height for squats. The American College of Sports Medicine recommends 2–3 resistance training sessions per week for health benefits and neuromuscular adaptation; for strength-specific phases, 3–4 sessions are common. Warm-up protocols are critical: dynamic mobility, 5–10 minutes of light cardio to increase core temperature, and progressive barbell warm-up sets are proven to reduce injury risk and improve performance.
Progression and load management: use percentage-based training or RPE (rate of perceived exertion) to manage intensity. Typical novice progression is linear — adding 2.5–5 kg to compound lifts each session/week depending on exercise and experience. Intermediate and advanced lifters use wave loading, autoregulation, or periodization to avoid plateaus. Practical example: a new lifter might start with a 5x5 program at 70% of estimated 1RM and increase load by 2.5–5 kg weekly while maintaining form.
Common safety gear includes a loaded bar path visual plan, chalk for grip, and spotters or safety pins when training near maximal loads. For home gyms, consider a full rack with safety pins set at a height to catch failed reps. Visual description: imagine a photo showing a barbell in a power rack with red and blue calibrated plates, safety pins set at mid-thigh, and a mirror behind for frontal bar path assessment. Practical tip: always perform heavy singles or triples with a spotter present or inside a rack with safety pins locked.
Case study: A 40-year-old recreational lifter added a basic barbell program twice weekly with an emphasis on squat and deadlift technique and saw an 8% increase in back squat 1RM and improved posture metrics in 12 weeks. Key takeaways were consistent warm-ups, incremental load increases, and recording sessions in a training log.
Choosing the Right Bar and Plates
Selecting the right bar and plates directly impacts technique and long-term comfort. Bars vary by diameter, length, and sleeve rotation. Olympic men’s bars (28–29 mm diameter, 2.2 m length) are standard for most gyms. A thicker 32 mm bar is common in strongman training and benefits grip strength but can challenge lifters with smaller hands. Consider the following checklist when choosing equipment:
- Bar diameter and knurling depth — match to your grip and lift type.
- Sleeve rotation — bushings are durable; bearings suit Olympic lifting.
- Bar whip — important for cleans and snatches; too much whip hinders heavy squats.
- Plate type — calibrated steel plates for accuracy; bumper plates for Olympic lifts and for dropping bars safely.
- Safety collars — spring collars for convenience; lock-jaw collars for maximum security.
Practical examples: use bumper plates and a 20 kg Olympic bar for cleans; use calibrated steel plates for powerlifting meets. For home gyms on a budget, a convertible barbell set with rubber-coated plates is a versatile and quieter option. Tip: weigh your plates periodically—cheap plate sets may vary by ±1–2% which affects precise percentage-based programs.
Programming and Progression for Barbell Training
Effective programming for weight lifting with bar blends specificity, progressive overload, and recovery. Start by defining primary objectives: strength (1–5 reps), hypertrophy (6–12 reps), or power (1–5 reps with high velocity). The weekly frequency for compound lifts is often 2–4 times per muscle group depending on level and recovery capacity. Evidence-backed approach: beginners typically respond to full-body training 3x/week; intermediates benefit from split routines (upper/lower, push/pull/legs) 3–5x/week where volume is distributed across days.
Structure your weekly plan with core lifts (squat, bench press, deadlift, overhead press, row, hinge) and accessory work targeting weak links (glute bridges, Romanian deadlifts, face pulls). Use a mix of intensity and volume across microcycles: an example week might include a heavy squat day (4–6 sets at 85% 1RM), an accessory-focused day (3–4 sets of 8–12 reps), and a dynamic effort day (8–10 sets of 2–3 reps at 50–60% focusing on speed). Recovery strategies include sleep optimization (7–9 hours), protein intake of 1.6–2.2 g/kg body weight for hypertrophy, and deload weeks every 4–8 weeks depending on accumulated fatigue.
Step-by-step plan for a 12-week beginner-to-intermediate transition (practical guide):
- Weeks 1–4: Build technique and base volume — 3 full-body sessions/week, 3–4 sets of 8–10 reps for main lifts at 60–75% 1RM.
- Weeks 5–8: Increase intensity — shift to 4 sets of 4–6 reps at 75–85% 1RM, add accessory lifts for posterior chain twice weekly.
- Weeks 9–11: Peak strength — include heavy singles/doubles at 90–95% with higher rest times and lower volume.
- Week 12: Deload — reduce volume and intensity by 40–60% and reassess 1RMs.
Sample numeric progression: if initial squat estimated 1RM = 120 kg, start Week 1 sets at 70% = 84 kg. Increase load by 2.5–5 kg per week depending on RPE and technique. Track RPE; if sets consistently reach RPE 9 across sessions, hold or reduce load to avoid overtraining.
Sample Programs and Periodization
Periodization choices depend on time available and goals. Linear periodization works well for novices: steady increases in intensity with controlled volume. For intermediates, block periodization (mesocycles focusing on hypertrophy, strength, then peaking) optimizes adaptations. Example block plan for a lifter focusing on strength:
- Mesocycle 1 (4 weeks) — Hypertrophy block: 3–5 sets of 8–12 at 65–75% 1RM.
- Mesocycle 2 (4 weeks) — Strength block: 4–6 sets of 3–5 reps at 80–90%.
- Mesocycle 3 (3 weeks) — Peaking block: low volume, high intensity with singles at 90–97%.
Practical case study: A 28-year-old intermediate followed block periodization and reported a 12% increase in combined squat and deadlift 1RM in 16 weeks, attributing success to structured recovery and targeted accessory work addressing a weak lockout. Best practices: always include technique-focused sessions with lighter loads, monitor fatigue using subjective scales, and prioritize progressive but manageable increments.
Technique, Common Mistakes, and Coaching Cues
Proper technique in weight lifting with bar is non-negotiable for sustained progress and injury prevention. The three pillars of a safe lift are alignment, bracing, and bar path. Alignment refers to joint stacking (ankle-knee-hip-shoulder alignment in squats), bracing refers to intra-abdominal pressure and a neutral spine, and bar path is the vertical movement line of the barbell—ideally a straight or slightly vertical path depending on lift. Common technical errors include excessive forward knee travel in squats, early lumbar rounding in deadlifts, and flaring elbows in bench press. Each has specific corrective strategies.
Coaching cues should be simple, imagery-based, and actionable. Examples:
- Squat: "Push the floor away" (encourages posterior drive), "chest up" (prevents forward torso collapse).
- Deadlift: "Chest proud, hips back" (maintains hinge and prevents lumbar flexion).
- Bench: "Drive feet into ground" (creates leg drive), "elbows at 45 degrees" (protects the shoulder joint).
Use video analysis to spot technical leaks: shoot lifts from sagittal and frontal planes, compare bar path to an ideal line, and note timing of hips and shoulder extension. Visual element description: a two-frame animation can display an ideal bar path overlay and the lifter’s actual path, highlighting deviations in red. Implement corrective accessory work such as Romanian deadlifts for hamstring strength, glute-ham raises for posterior chain development, and face pulls for scapular health.
Step-by-step technical checklist before a heavy set:
- Foot placement and grip width set; breathe and brace for 2–3 seconds.
- Engage lats and set shoulder position; perform the first concentric rep slowly to confirm form.
- If form degrades across reps, reduce load, shorten set, or change tempo to maintain quality.
Video Analysis and Cueing for Better Lifts
Video analysis is a high-value tool for lifters and coaches. Record lifts from two planar angles (side and front) at 60–120 fps if possible. Use slow-motion review to inspect the timing of the hip hinge, knee drive, and bar path. Typical coaching workflow:
- Record three reps of a main lift after warm-up.
- Review in slow motion focusing on first and last rep mechanics.
- Identify one primary technical flaw and one secondary target (e.g., primary: early lumbar flexion, secondary: weak lockout).
- Assign 1–2 corrective exercises and an immediate cue for the next session.
Example cue set: for a lifter with forward torso collapse in squat — cue "stay tall" plus perform 3 sets of 8 paused squats and 3 sets of single-leg RDLs twice weekly. Track improvements by retesting and comparing bar path overlays. Best practices: limit coaching cues to 1–2 per session, focus on consistent repetition quality, and use objective markers like bar speed or beam timing when available.
FAQs
Q1: How often should I perform weight lifting with bar to see strength gains? A: For most lifters, 2–4 sessions per week focusing on barbell compound lifts will produce consistent strength gains. Beginners often progress on 3 full-body sessions per week; intermediates typically use 3–5 sessions with increased specialization. Ensure adequate recovery, protein intake, and progressive overload.
Q2: What is the safest way to increase my 1RM on the squat or deadlift? A: Use gradual load increases (2.5–5 kg per week for novices), structured periodization, and accessory work targeting weak points. Incorporate deloads every 4–8 weeks and utilize technique-focused sessions with lighter loads to reinforce form.
Q3: Do I need specialized bars for Olympic lifts or powerlifting? A: Yes—Olympic bars with bearings and more whip are preferable for cleans and snatches, while powerlifting bars are stiffer for heavy squats and bench presses. However, many standard Olympic bars are versatile enough for general training.
Q4: How important is nutrition for progress when weight lifting with bar? A: Nutrition is critical. Aim for 1.6–2.2 g/kg protein for muscle gain, manage caloric intake based on goals (surplus for hypertrophy, deficit for fat loss), and prioritize carbohydrate timing around sessions for performance.
Q5: Can beginners lift heavy safely with a barbell? A: Yes, if they prioritize technique, use appropriate progressions, warm up properly, and train inside a rack or with spotters for heavy singles. Starting conservative and tracking progress reduces injury risk.
Q6: What are best practices for recovering between heavy barbell sessions? A: Prioritize sleep (7–9 hours), adequate protein and calories, active recovery (light mobility work), and strategic deload weeks. Monitor fatigue via RPE and readiness questionnaires to prevent overreaching.
Q7: How do I choose between percentage-based programming and RPE? A: Percentage-based programming offers precision and is ideal when 1RMs are known. RPE/autoregulation is superior when daily readiness varies; it allows load adjustments based on subjective effort and can reduce overtraining.
Q8: What common mistakes should I avoid when training with a bar? A: Avoid ego loading, neglecting warm-ups, ignoring mobility deficits, and training through compromised technique. Limit coaching cues to one or two corrections per session and prioritize consistent, high-quality repetitions.